Wednesday, November 23, 2011

Irish Dance Dress (Functional 3D Item) - Background Research

I agreed with Sian at summer school that I would make my elder daughter a dress for her Irish dancing as my functional 3d item. That seems an awfully long time ago!  Since then, I have been concentrating on making one for her sister using commercial embroidery designs as a kind of trial run (you can see it here on StitchDance) and doing lots of reading and looking at dresses both on the web and in real life.  In a moment I will be showing photos of my notebook, but I thought it would be useful to start with some notes and a glossary.

Glossary

Feis (plural feiseanna) pronounced “fesh” – lit. festival, an Irish dancing competition.

Class dress –  a distinctive costume associated with a particular school.  In An Comdhail competitions that we attend,  dancers competing in age groups under 9 and below, and beginners of any age are not allowed to wear solo dresses, so they will either wear a class costume or a plain skirt and top.  Class dresses are also used for team dances (figures).

Solo dress – competitions mostly focus on solo dancing - although dancers usually perform three at a time they are each doing their own steps - and dancers aspire to wear a solo dress designed and made for them (but most will buy second-hand).  Every dress is unique; although there are distinct styles and colours that go in and out of fashion, a particular design will not be repeated exactly.  Solo dresses are more elaborate then class dresses. NB although referred to as dresses, costumes may be made with a separate bodice and skirt.

An Coimisiun le Rinci Gaelacha (CLRG) and Comdhail Na Muinteoiri le Rinci gaelacha  (An Comdhail) – two major governing bodies for Irish dancing. 

The history of the development of the dancing schools and the costumes in the first half of the twentieth century is  closely bound up with politics and Irish nationalism. For anyone interested in finding out more background, I would recommend  The Story of Irish Dance by Helen Brennan, pub Brandon 1999, and Irish Dancing Costume by Martha Robb, pub Country House.  I found it very helpful to see how the styles have evolved and the invention of ‘traditional’ dress.

Permitted Costume Styles

CLRG published updated rules on costumes in September 2010 – you can access the complete list here but the key points are

  • Necklines must be high enough to cover the collarbone.
  • Sleeves to start at the shoulder and end at the cuff.
  • Skirts no shorter than mid-thigh.
  • Costumes must have a full front, back and sides (i.e. no cutaway or transparent panels and skirts must have a full backing).

In essence, the basic shape is a long-sleeved, short skirted dress with a dropped waist and back zip.  

Irish dance dress notes (2)

These pages show second-hand dresses offered for sale at a feis – a good way of seeing a mixture of styles.  On the left-hand page, the dark blue dress is in what is referred to as traditional style – large areas of  satin-stitch knotwork on a plain dark background, and a stiffened box pleat skirt.  These often had white crochet collars.   The other three are more up-to-date and you can see how at times there is no reference to traditional motifs.  On the right hand page, there are two dresses with ra-ra skirts which are very popular (apart from looks, they are considerably lighter than the stiffened styles). The dress with the violet bodice, which was made in 2011, has a puffball, plisse skirt and also shows the move towards building up decoration by repeating small knotwork motifs (this also gives you an idea of prices).

Irish dance dress notes (3)

The back of the dress is also important.  These styles have developed from the traditional shawl pinned over one shoulder.  A few years ago, there was a fashion for dresses in the classic stiff-skirted shape but made entirely in glittery fabrics using applique rather than embroidery, and these have a stiff ‘kite’ on the back as a reference to the shawls.  Most new dresses I see now have either a sash across the back or a shaped shawl (attached with Velcro), although some have a large bow at the dropped waist. There is also a trend to attach the shawl further down from the shoulder  and to continue the embroidery around the back of the dress.   All the photos in these two pages have been collected onto a board on Pinterest which anyone can see here (and this also credits the sources).  A quick trawl on ebay will also come up with many dresses for sale.


Irish dance dress notes (4)

A collection of images from dressmakers websites recording some of the various current skirt styles.   The older-style stiff skirts  have brightly coloured contrasting linings which show as the skirt moves and the girls wear matching lycra or satin ‘kick-knicks’ underneath.  Irish dancing is popular in the USA and fashions cross the Atlantic as competitors meet at international competitions – a good site for US fashion updates is  http://feisonista.com/

Armed with all this background information – the next step is to start thinking about the design.  But first I want to sort out my notes on lace for the beginning of module 5, so that will be my next post.

Monday, November 21, 2011

Silhouette Quilt

Every now and again, I decide I need to practice free machining to get more control.  This time, rather than just stitch random samples, I took one of the designs from my City and Guild diploma work on faces which was based on  a silhouette of my daughter (see this post on Gallimaufry for details) and made a little quilt, about 18” by 12”.  I wanted to try working some of the interesting fillers designs from the free motion quilting project but made the fundamental error of choosing very busy fabric, which meant that most of the time I couldn’t see what I was stitching.  Still, you learn by your mistakes  - the next one will be better.
2011-10-31 10.48.31
Front
2011-10-31 10.50.02
Back

Finally - an Irish Dance Dress

Well, I have been a bit quiet on the blogging front recently but not entirely idle.  I have spent rather a lot of time making a dance dress for my younger daughter and we didn’t want to show it until it was finished.  As tends to happen, it turned out nothing like the original plan so that is probably just as well.  She is very into “dark romance” (but gets very offended if you call her a goth) wears an awful lot of black, and reads novels with vampires in, so there was no point in making a frothy, girly dress. 
2011-11-05 17.53.13
Here she is ready for her competition (apart from the shoes).  The dress is black silk with machine embroidery and the skirt is lined with the same red satin as the shawl – I themed it on a raven which is her favourite bird and  crops up in celtic mythology.  We added a fluorescent red tutu underneath to make the skirt fuller and it gives a flash of  bright colour as she dances.  It doesn’t come out in the photos, but the dress is actually quite sparkly – I stuck on over 220 Swarovski rhinestones.  Many on the bodice are black so they reflect under lights but look more like studs (again a bit less girly).  The machine embroidery designs came from the embroidery library, I  just changed the colours to fit her style.  
2011-11-06 16.04.05
I rather like the small bird on the shawl which was stitched onto felt and cut out to make a brooch.  The finishing touch is the headband –  more machine embroidery but this time it is my own design.  And more bling of course.
2011-11-06 16.04.162011-11-06 16.06.55
You may already know that I am going to design and make an Irish dance dress for my elder daughter as part of my City and Guilds coursework (functional 3d item) – so keep an eye on my blog Gallimaufry as I will shortly be posting my background notes on styles and fashions.

Sunday, October 23, 2011

Embroidered X-Rays

Go and check out the work of Matthew Cox - fascinating use of embroidery on x-rays, sometimes a bit creepy, sometimes touching.  Tip passed on from Urban Threads blog StitchPunk 

Tuesday, September 27, 2011

Module 4 Artist Study

I am continuing to collect notes and images of interesting artists.  For this exercise, I thought it would be interesting to compare two textile artists who have used a similar process and starting point, and whose work relates to my theme of industrial landscape.  Both Michelle Loughlin and Clare Lane take photographs of urban decay, print them on fabric and add stitch, but their motivations and the resulting work are very different.

The photographs in this post show the notes in my sketchbook; images of each artist's work can be seen at the links given under references.

Michelle Loughlin

Michelle Loughlin is an American textile artist who  made a series of work using hand stitching on photographs in 2007/2008.  Urban Weavings is a collection that celebrates the urban landscape in her home city New Jersey City, NJ, using photos of sites that are interesting historically or important to the community.  These could be demolished or abandoned buildings, or buildings being redeveloped all of which Michelle recorded before they changed as the area became gentrified.  Her motivation was personal, a reaction to feeling helpless in the face of rapid redevelopment of the place she lives in and knows well.
 
These are small works, less than 20cm square, and mounted very simply.  The photograph is printed onto cross-stitch fabric and then stitched freely, with bright threads adding colour, texture and life.    Rather than simply recording the scene, she responds to it and uses the stitches to complete the picture, to make it more beautiful and vital.  She has said of the building that inspired her piece 410 Bergen Lafayette that she 'would drive by and think how can I make that prettier?' Her stitches have a boldness and simplicity to them, as if doodling with crayons, highlighting selected areas; a stitched intervention into the street scene.  

References

Home Sweet Home, Embroidery Jan/Feb 2009


Clare Lane
I first heard of Clare Lane when I visited her solo exhibition at the Stroud textile Festival in 2008, and  I was immediately taken by her hyper-realistic  images of urban and industrial sites in decay ; I was struck too by the emptiness, the absence of people. 

The stretched canvases on show were large, over a metre each way, displayed unframed, and showed photographs that had been digitally manipulated, simplifying the colours into chunky blocks.  These had then been stitched in some areas with matching threads, creating a change of texture and depth.

Clare describes what she does as 'unashamedly process driven', starting with walking the streets and taking hundreds of photographs.    The next stage is to work with the images in Photoshop.  She may use a single image or create a montage, cutting elements from several photographs to create her composition.  She may also add layers of scanned images, for example drawings, painted backgrounds, paper cut-outs, text, and apply a variety of filters.  The key part of the process is digitally overpainting the whole picture, concentrating on colour and shape and working at such a high level of detail that she may spend hours on a tiny part of the image, looking at it as an abstract arrangement of colour and shape.  Because of the size of the finished canvases, she cannot see the final  effect until it has been printed on fabric.  Then comes the stitching, using an Irish machine to fill in solid blocks of colour on parts of the image, which relieves the flatness of the digital print.  This is so subtle that on first glance you may not realise it is there, and it is not always apparent in photographs of her work.

Clare Lane came from a background in architecture and surveying before studying for a textile degree, and her inspiration comes from urban dereliction, our contemporary ruins, which are rarely looked upon as kindly as those that are hundreds of years old, yet they hold the same stories. She describes how she is interested in the 'visual cacophony' of the urban landscape, the way that buildings are surrounded by all sorts of other things that are there without an overall design - rubbish, street signs, road markings.  
  
References

Urban Fabrication,Clare Lane,  Design-It issue 76 (Computer Textile Design Group),2011.
Toil and Rubble,  Jo Hall,  Embroidery July/August 2008.
Stroudwater International Textile Festival Catalogue 2008.
www.urban-fabric.co.uk Clare Lane's website.


Wednesday, September 21, 2011

Finishing off Module 4

Just the artist's study left to do (which I am working on) so to finish off the module, here are my additional notes on health and safety when feltmaking.

Wet Felting
  • Ensure a safe working area by mopping up any water from the floor immediately.
  • Be aware of your hands becoming sensitive to prolonged exposure to soap/detergents and choose products with care.
  • Felting is a physical activity - be careful when rolling the felt to avoid strains to your back and wrists from repetitive movements and take regular breaks.
Needlefelting
  • The needles are very sharp, take additional care to keep your fingers clear from the points.
  • Store hand felting needles with the barbs covered (eg with a small piece of foam) to avoid cutting your hands.
  • Use the guard on the machine and ensure it is adjusted correctly each time.
  • Stop the machine as soon as you feel any unusual resistance and clear out the lint regularly.
  • As with any machining, watch your posture and take regular stretch breaks.

Finishing Chapter 11 Resolved Samples

I decided to concentrate on three of the samples from my previous post and leave aside the yellow one.  Firstly, photo 9 shows the 3d double-sided sample, inspired by the paper sample from chapter 9 shown in photos 10 and 11.  I had intended to copy the paper version by bending the shapes in the same way, but this didn't work well in felt ( I think it is too thick and soft - the design calls for something crisper).


Photo 9

Photo 10

Photo 11
Then the last two needle-felted samples after stitching.  I have had trouble photographing these as the colours are so delicate - there is more contrast in real life.  Photo 12  - the shapes have been heavily hand-stitched so they seem to grow out of the background.

Photo 12

Photo 13 - the slips have been secured in place with a scattering of detached chain stitches and more stitching has been added to the background.

Photo 13

Sunday, September 04, 2011

Street Art in Bristol

I used to work in these office blocks and they were pretty grey and grim 20 years ago  - the heating was rubbish so we had smelly gas heaters next to our desks (yuk).  I was pleased to hear that they were being given a makeover by invited street artists.


And I like these examples of yarnbombing

Love the sign on the old police station.


Friday, August 26, 2011

Module 4 Chapters 10 and 11 - Work in progress

 The end of this module is in sight at last - I have been beavering away at it over the last few weeks in between dressmaking and kides coming and going, so I got a bit behind with writing it up (and that is why the sketchbook entries suddenly stopped).  I am hoping that typing up a blog post will sort it all out in my head!  These two chapters are all about feltmaking, leading to resolved samples using felt as a background to stitch.  I decided to base my colour scheme and resolved samples on this colour study from module 1, which was developed from a picture of a vintage car radiator taken in Bristol Industrial Museum.  I thought that the rather out of focus photo related well to the softness of felt and I could use some pieces of the fabrics I had already dyed together with wool tops bought in similar colours.


Pages from module 1 work
Dyed scraps


First up are some trial pieces of wet felting that can be cut up and played with further.

Photo 1
 Photo 1
 These are quite thick pieces - the blue is very chunky, double sided with sandy yellow on the back, the purple is thinner and uses 3 or 4 colours mixed together.  The sand/gold is one colour with a sprinkling of silk waste felted in, which doesn't show as much as I thought it would.  I also made a piece of thick double-sided felt in the green/pink combination from chapter 9 to explore those shapes further, but didn't get a photo before I cut it up.

Photo 2
Photo 2
Top left is just plain blue, bottom left has fragments of scrim and silk embedded in the top layer.  The sand coloured sample has been deliberately felted less to keep it softer and more flexible, and I embedded lots of metal shavings that a friend had given me, to keep the theme of machinery and add a contrast texture.  Top right  - I cut strips from the green/pink piece and felted them into the background.  The strips were thicker so they give bumps on both sides of this sample, which I like but the colour contrast has been lost.

Photo 3
Photo 3
A friend suggested I try making nuno felt and very kindly lent me a pair of carders so I could mix the wool colours more effectively and draw out thinner layers.  The top sample used a piece of my dyed scrim as the base which shows through as pinker patches, but I was a bit heavy handed with the wool and the felt is still quite stiff.  For the bottom sample, I used far less wool over white scrim (a different combination of colours on each side) and left it almost bare in places so that it pulled and crinkled as the wool shrank.  This piece is much more delicate; lovely and soft to handle.

Photo 4
Photo 4
The first resolved sample which uses the two pieces from photo 3.  I cut strips from the thinner piece of nuno felt and applied them as flaps to the background using an embellisher (needlefelting machine) letting them pleat slightly.  I arranged them to echo the fluted shapes in the photo of the car radiator and then added lots of cut up pieces of the same felt. I added knotted and couched threads and some little woven wheels.  I really like this sample, but it seems to have turned into an underwater scene when I wasn't looking.

Photo 5
Photo 5
This is the double sided thick piece of felt cut up into shapes from chapter 9 designs.  I have stitched on both sides and intend to combine them into a 3d sample.

Photo 6
Photo 6
Another work in progress - a second  version of the radiator shapes, using the piece of felt that has metal turnings embedded.  I used the embellisher to pleat the background and stitched in the smaller pieces.  Not quite sure how this will work out, but I am thinking of adding some larger metal scraps - some of them are like coiled beads.

Photo 7

Photo 8

Photo 9

 Photos 7,8 and 9
I had had enough of soap and water for the time being so moved on to needle felting with the embellisher.  I made a background using a piece of commercial pre-felt as a base and adding a layer of wool.  I then chopped up dyed scrim into very small pieces and felted them on top, mixing and changing colours as I went.  Working heavily with the machine broke the scraps down almost into individual threads and fixed them in place, giving a soft and light piece of felt with a really interesting surface.  I cut the background in two and then carefully cut shapes from one piece and added them to the other, again using designs from earlier work.  I filled the holes by inlaying some of my plain blue felt.  Giving me two more half-finished samples to work on.  I need to look again at the one in photo 7 as the edges of the cut out shapes show the pre-felt, so this needs sorting out.


Friday, August 19, 2011

Finding the colour of...


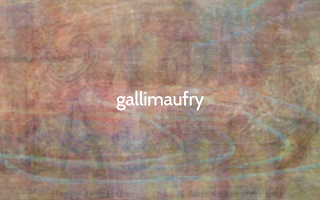
I came across this intriguing website the color of from reading Trekky's blog.  If you choose a word, it combines images from pulled from Flickr and averages out the colours give you the colour of your word.  I like the image for gallimaufry - suitably random.

Monday, August 01, 2011

Sketchbook day 10 and 11

Colour study based on this group of apples, reel of thread and wisteria leaves.  On the left, colour built up in layers of pastels and koh i nor paints.  On the right, soluble pencils and scraps of dyed fabrics.


Wednesday, July 27, 2011

Sketchbook Day 9 Still no zebra.

Today is all about stripes. I folded a piece of of blue and white fabric and tried to draw just the pattern, seeing how the stripes behaved over the folds.  The first two sketches with soluble pencils were bit smudgy so I tried again with the wide end of a promarker and drew more boldly.  To find out about the exercises I'm doing go to Sian's blog.


Tuesday, July 26, 2011

Exhibition - Gordano Textile Artists

A quick plug for our exhibition coming soon - it is my first time with this well-established group so please come along if you are in the area.

 Gordano Textile Artists at the Toll House Gallery, Clevedon Pier, North Somerset.
2nd to 30th August, 10am to 5pm Mon-Fri, 10am to 6pm Sat and Sun.
Meet the artists each weekend 11am to 3pm - I will be there on Sat 6th August and Sat 27th August.

Exhibition - Gordano Textile Artists

A quick plug for our exhibition coming soon - it is my first time with this well-established group so please come along if you are in the area.

 Gordano Textile Artists at the Toll House Gallery, Clevedon Pier, North Somerset.
2nd to 30th August, 10am to 5pm Mon-Fri, 10am to 6pm Sat and Sun.
Meet the artists each weekend 11am to 3pm - I will be there on Sat 6th August and Sat 27th August.

Sketchbook Day 8

Drawing without drawing - suggesting the object by drawing just the surface pattern. Kind of like the stripes without the zebra.  I didn't have a zebra handy so I used a shell instead.  My first attempt with a serrated edge and paint didn't work so I tried again with the side of a piece of charcoal.


Monday, July 25, 2011

Sketchbook day 7

Back to the cut  up apple,which is developing some lovely crinkly edges.  Today the challenge is to work larger and quickly using thick and thin lines - I used a piece of charcoal on its side for the edges and shadow.


Sunday, July 24, 2011

Sketchbook day 6

I'm feeling much better now so thanks to everyone for your good wishes.  As this exercise is all about shadows I have gone back to a banana.  This one has definite ridges and very little variation in colour so it made it easier to concentrate.

I got a bit lost with the first drawing and couldn't see what was banana and what was shadow, so for the second one I outlined in black pen.