Friday, September 24, 2010
Inspiring Photography
Soon, I will get some coursework done, I promise. Meanwhile, I was at a wedding last weekend, and was introduced to a fellow guest who turned out to be a French photographer who takes the most wonderful pictures of rusty surfaces and broken bits of machinery. How lucky is that? So we had a bit of a chat (sort of - I can't speak French) about colour and texture and swopped blog addresses. Go and take a look for some inspiration at http://kadier.canalblog.com/.


Monday, August 30, 2010
Finishing off Week
Its a good week for finishing off. Do you remember this cushion from earlier posts? Just about done before it reached its first anniversary.


Sunday, August 29, 2010
Animated Weaving
The potatoes are boiling over, the roast is overdone but before I go offline I had to share this with you. Follow the link to see a marvellous animated weaving.
http://amovablefeast.blogspot.com/2010/08/mother-of-all-projects.html
http://amovablefeast.blogspot.com/2010/08/mother-of-all-projects.html
Thursday, August 26, 2010
Summer Playing
Well, August seems to have shot by in a blur of busy-ness. I can't believe it is almost two weeks since the Three Choirs Festival in Gloucester - I was showing work in an exhibition (which you can read about over on Gallimaufry) and singing in the choir for Jazz Psalm Sunday in the cathedral. Quick plug here- the BBC recorded the concert and it is apparently going to be broadcast on Radio Gloucestershire on Bank Holiday Monday and after that will be available on BBC i-player Update - 2pm on Monday 30th 107.40FM or online at BBC.co.uk. It is a wonderful mix of gospel and jazz with a large choir and fantastic musicians - highly recommended. End of plug.
So, you know how it is after you have worked really hard for an event and when it is over you feel a bit flat. I thought I would liven myself up by showing you some things I have been playing with in between acting as chauffeur for the kids.
First up, lots of printing on fabric to practice the layering techniques learnt with Ruth Issett at the Distant Stitch summer school. No particular plans for these at the moment, just lots of samples.
Using stitch as a resist. The one on the left was an impression of the one on the right (put the fabric on top and rolled over).

Layers of textile paint and a thermofax screen.


This sample was folded, stitched and painted several times - you can see the stages although they seem not to be in the right order.


Added monoprints.

Tried a fish stencil - not sure I like it!


A little piece made into a card.

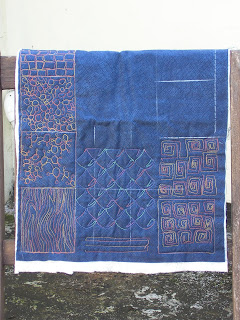
I keep thinking I need to improve my control on my free machining, so I have tried working some patterns from Leah Day's blog http://freemotionquilting.blogspot.com/ - she posts videos to show how they are done. I have been practicing on 4" squares round the edge of a quilt sandwich that was a sample for my fish quilt. Not brilliant but getting better.
So, you know how it is after you have worked really hard for an event and when it is over you feel a bit flat. I thought I would liven myself up by showing you some things I have been playing with in between acting as chauffeur for the kids.
First up, lots of printing on fabric to practice the layering techniques learnt with Ruth Issett at the Distant Stitch summer school. No particular plans for these at the moment, just lots of samples.
Using stitch as a resist. The one on the left was an impression of the one on the right (put the fabric on top and rolled over).

Layers of textile paint and a thermofax screen.


This sample was folded, stitched and painted several times - you can see the stages although they seem not to be in the right order.


Added monoprints.

Tried a fish stencil - not sure I like it!


A little piece made into a card.

I keep thinking I need to improve my control on my free machining, so I have tried working some patterns from Leah Day's blog http://freemotionquilting.blogspot.com/ - she posts videos to show how they are done. I have been practicing on 4" squares round the edge of a quilt sandwich that was a sample for my fish quilt. Not brilliant but getting better.

Thursday, August 12, 2010
There is Beauty in the City
This is an ongoing project by artist Anna Francis which you can read about here. The idea is very simple and everyone is invited to join in - just request one of the magnets, place it in somewhere in a city that you think is beautiful or has special resonance for you, take a photograph and send it in. The photographs are gathered together and exhibited as a group as well as being posted on the blog. I have sent in my picture of a park in Bristol which used to be a quiet lunchtime retreat when I worked in the city centre.
Wednesday, August 11, 2010
Work in Progress - Headbands
Spent the day working on the first batch of headbands for the ceili team - here they are just waiting to have the crystals added. The white and green match the trims on their costumes, the black and orange one is to match my elder daughter's solo dress.


Exhibition Pictures
So, at last here it is in situ under the church tower. I decided to call it 'Glimpsing the Storm' to make the connection with St Nicholas as patron saint of sailors. I rather like the way it has no visible support from the front as the pole is hidden.
You can also see 'Cogitation' on a low stand and other pieces hanging on boards - you may remember some of these from earlier posts. And the good news is that one of the collages has sold.


You can also see 'Cogitation' on a low stand and other pieces hanging on boards - you may remember some of these from earlier posts. And the good news is that one of the collages has sold.


Sunday, August 01, 2010
Exhibition Details
Exhibition Mon August 9th to Sat August 14th
St Nicholas church, Westgate Street, Gloucester, GL1 2PG
I will be showing my hanging and some other pieces, there is also a quilt exhibition called 'Quilted Jewels' and engravings by Sarah van Niekerk. The church is very near the cathedral and will be open 10:30am to 4:00pm each day and admission is free, however it is being used for a lecture on Monday 9th at 1.30pm and a concert on Weds 11th at 2.00pm. This exhibition is part of Three Choirs Plus running alongside the Three Choirs Festival so there will be lots going on in Gloucester all week - well worth a day trip if you are in the area. See http://www.3choirs.org for more info
Still no pics of the finished item - somehow whenever it is not raining (or threatening to rain) it is really windy so I can't get the hanging to keep still. I will try and get some good shots in situ. Meanwhile, back to double and triple-checking everything is ready.
Thursday, July 15, 2010
Keep forgetting to take photos...

I have also been keeping busy fiddling with my daughter's Irish dance dress. I got it secondhand and knew it needed a bit of TLC, but when I looked inside, I realised that under the layer of organza is a glorious fluorescent orange. So I decided to cut away the top layer...


Distant Stitch Summer School
I can't believe it is over a week since the Summer School at Urchfont, I have been hard at it since I came back sorting out all my bits. I have been very good this time and spent an afternoon at home making up my sketchbook with notes and samples. Ruth Issett was an excellent tutor and worked us very hard, and it was wonderful to meet up with old friends and some I only knew online. As an icebreaker, we had a mystery ATC swop - here's the one I made from a photo of the London Eye with a little floral graffiti added.

We had a group discussion about the etiquette of photographing other people's work and how much it is fair to write about workshops on our blogs, so the pictures only show my own samples of printed fabrics. To see more, try following the links on the right as some of my fellow students have published their own pictures.

From these bits and pieces, I made up this design

I have also (definitely this time) finished the hanging after taking some advice from Sian, and sorted out a way to hang it so that it is freestanding and the pole doesn't show - looks a bit like an Indian rope trick. Plan A was to take some pics in the garden to show you, 'cos it's a bit big in the house, but after weeks of fine weather the wind and the rain have set in, so we will have to wait. It may take some time...

We had a group discussion about the etiquette of photographing other people's work and how much it is fair to write about workshops on our blogs, so the pictures only show my own samples of printed fabrics. To see more, try following the links on the right as some of my fellow students have published their own pictures.

From these bits and pieces, I made up this design

I have also (definitely this time) finished the hanging after taking some advice from Sian, and sorted out a way to hang it so that it is freestanding and the pole doesn't show - looks a bit like an Indian rope trick. Plan A was to take some pics in the garden to show you, 'cos it's a bit big in the house, but after weeks of fine weather the wind and the rain have set in, so we will have to wait. It may take some time...
Thursday, June 24, 2010
A Hanging - but is it finished?
I've spent the last week attacking the hanging with pin tucks. I laid it on the floor to see how it was going and took a photo.
Then I put it on the table to start sewing - it was scrumpled up to keep it from hanging over the edge and I realised it looked much better like that, so I played with it on the floor and decided I prefer the way it looks - see below.
OK not really like a crack but nice and stormy. Does it still count as a hanging if I display it on the floor? It is a lot shorter like this - about 1.5m. Not sure if it is finished so I am going to put it aside for now - I will be seeing Sian at summer school and get her advice.
A quick plug for anyone who doesn't already know - the Urchfont Manor open day is on Sunday 4th July and there will be exhibitions of work from the various textile courses there, including Distant Stitch students as well as traders. I will be there all day so come and say hello. The manor is set in its own grounds in the village of Urchfont near Devizes, Wiltshire and is a lovely place for a day out especially if the sun is shining.
 | |||
| Photo 1 |
 | ||
| Photo 2 |
OK not really like a crack but nice and stormy. Does it still count as a hanging if I display it on the floor? It is a lot shorter like this - about 1.5m. Not sure if it is finished so I am going to put it aside for now - I will be seeing Sian at summer school and get her advice.
A quick plug for anyone who doesn't already know - the Urchfont Manor open day is on Sunday 4th July and there will be exhibitions of work from the various textile courses there, including Distant Stitch students as well as traders. I will be there all day so come and say hello. The manor is set in its own grounds in the village of Urchfont near Devizes, Wiltshire and is a lovely place for a day out especially if the sun is shining.
Monday, June 14, 2010
Following a Theme
I have just been sorting out pictures from a half-term trip to Sussex and realised these ones from Pevensey Castle kind of fit in with what I have been doing.


Thursday, June 10, 2010
Thoughts on Colour
I had been thinking for a while that there was not enough difference in the tones of the colours on the hanging, so yesterday I used Markal sticks to lighten the large pale patch and touch up other areas and then carried on stitching. The pictures below show in greyscale the untouched fabric and its current state - not a huge difference but a bit more contrast. It also shows how the shadows from the tucks are adding darker areas - for now, I am leaving the lighter part untouched.
 | |
| Untouched fabric |
 |
| After painting and some tucks. |
Tuesday, June 08, 2010
Brief for Site Specific Hanging
The Brief
To produce a hanging for an exhibition at St Nicholas Church, Gloucester as part of the Three Choirs Festival in August 2010.
The Site
St Nicholas is a church located in the centre of Gloucester, a short walk from the cathedral, and dates back to the 12th century. It is no longer used for services but remains consecrated and is open to the public in spring and summer, frequently hosting art exhibitions. The church is noted for its pronounced lean which can be clearly seen when you stand in the nave – the pillars on the north side lean outwards as does the archway. During the week-long festival, there will be an exhibition of quilts in the centre nave and other artwork under the tower, along the north wall and on pews - this is where the hanging will be. The church will also be used for a number of music workshops and concerts.
Special Considerations
As this is an historic building, there can be no alteration or damage to the fabric of the church i.e. it is not possible to attach hooks or nails to the walls, although anything already there can be used. However, the curator is happy to tie items around the pillars, throw lines over beams or existing cables or hang very large artworks from the tower. In addition, there is a hinged pair of six foot hanging screens available and items can be placed on the floor under the tower, propped against walls and placed on pews.
The building is consecrated so although artwork need not be religious, it must not be offensive or disrespectful of the Christian faith.
 |
| St Nicholas Church from Westgate street. |
 |
| Floor Plan |
 |
| South window |
 |
| West Window |
 |
| Mock-up of hanging in situ. |
Following on from my earlier posts, I have decided to pursue the idea of using tucks to emphasise the design. As it would be difficult to back the hanging after it has been distorted, I tried another sample with a dark backing to see that the effect with two layers is still what I want. It does make the tucks appear softer, so in the sample shown below I tried slashing them to add some drama. You can also see in the lighter section that I experimented with kantha stitching but felt it was too organised
 |
| Sample showing slashed tucks on left. |

Friday, May 28, 2010
Photos from Stroud
Last week, I spent a day in Stroud touring various venues at the Textile Festival. As well as looking at the exhibits, I fell in love with this restored clock which stands in a window at the Museum in the Park.


Friday, May 21, 2010
Thinking Aloud - Ideas for Hanging Part 2
 |
| Photo 1 |
 |
| Photo 2 |
 |
| .Photo 3 |
 |
| Photo 4 |
 | ||
| Photo 5 |
 |
| Photo 6 |
Tuesday, May 18, 2010
Thinking Aloud - Ideas for Hanging Part 1
 | |
| Photo 1 |
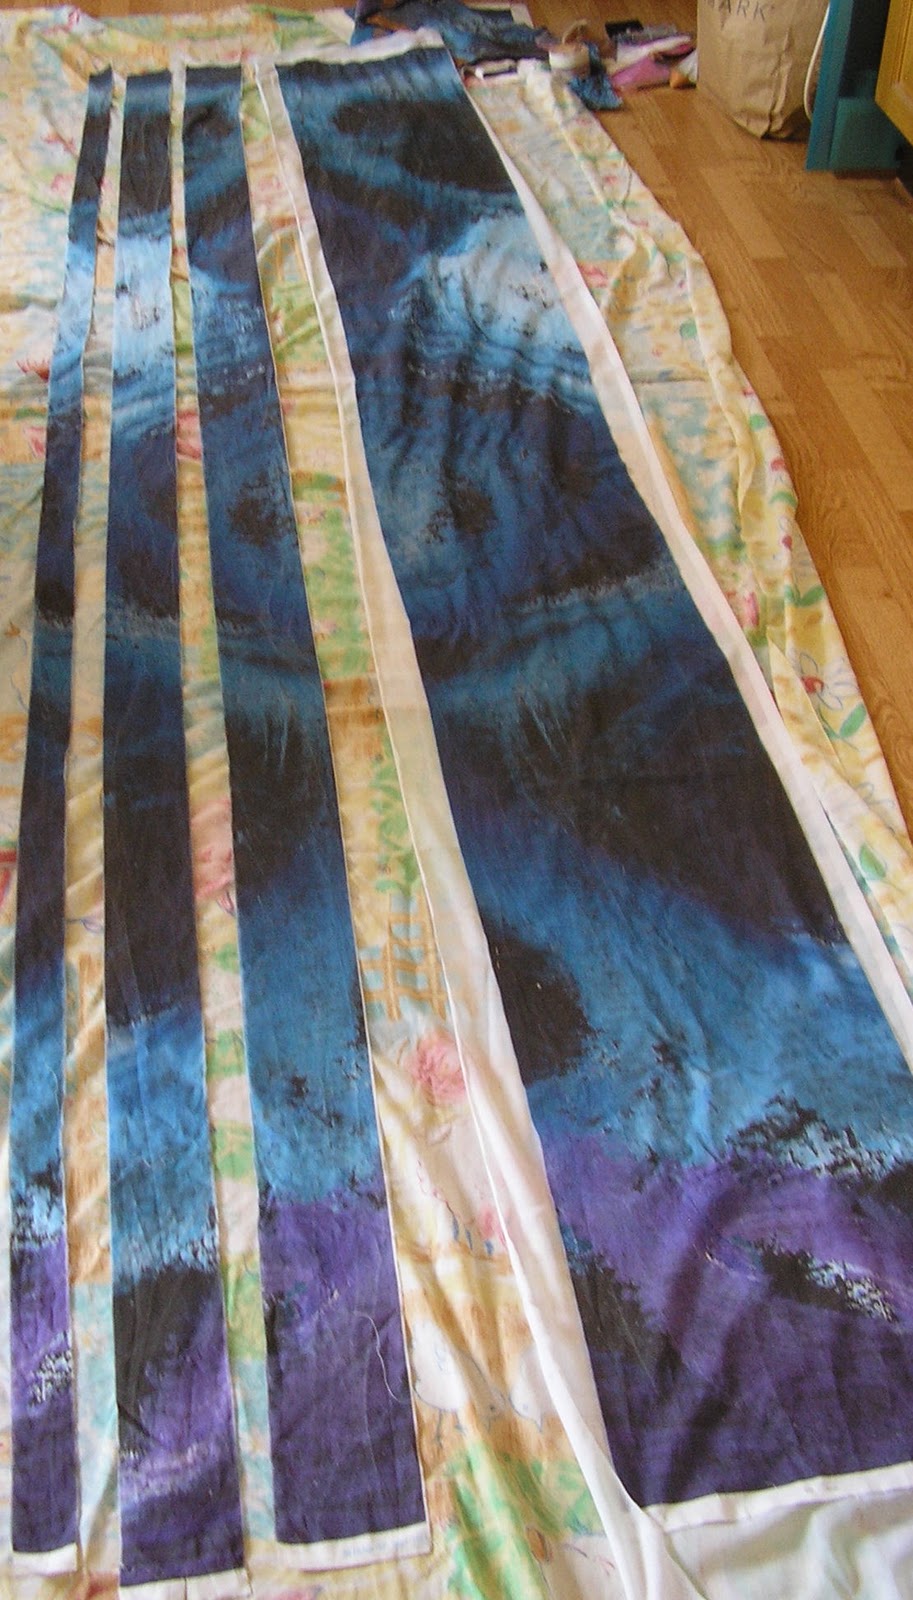
I spent some time (actually rather a lot) in total inaction because I liked the length of fabric just as it was, and I had to convince myself it would be okay to change it. I finally screwed up my courage and started cutting up the copies, reminding myself that nothing would be wasted as I can always use more patchwork cushions and the sofa is blue, so that's fine. I know I should probably play in paper and do drawings but it isn't the same.
As I was feeling stuck, I tried two different ideas simultaneously to see where they would take me. This post follows one and the next post will follow the other (just as soon as I retrieve my camera from being used for a school project by number 2 daughter). I have also revisited the planned site with the fabric and measured up and taken photos, so I can produce a room plan and show how it would look.
So - photo 2 mirror image cut into strips.
 |
| Photo 2 |
 |
| Photo 3 |
 |
| Photo 4 |
 |
| Photo 5 |
 |
| Photo 6 |
 |
| Photo 7 |
 |
| Photo 8 |
 |
| Photo 9 |
 |
| Photo 10 |
 |
| Photo 11 |
Subscribe to:
Posts (Atom)