Sunday, December 05, 2010

Module 4 Chapter 3 - Part 2

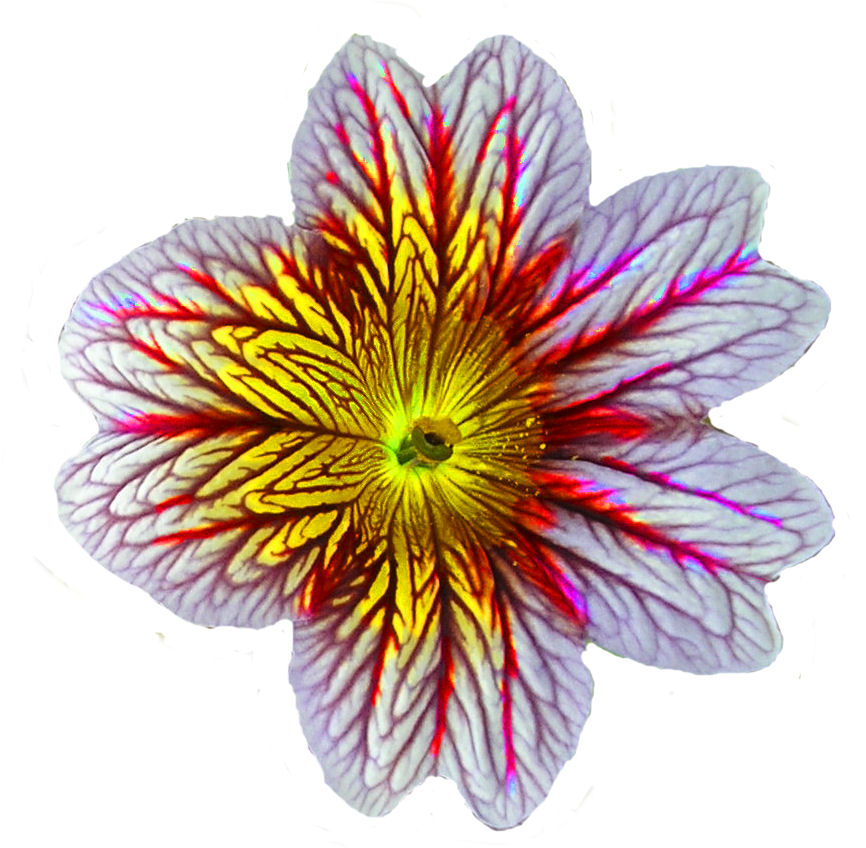
More playing with flower images in Paint Shop Pro, looking at patterns, because I enjoy it -

1. Using the kaleidoscope effect on flower head  - 10 petals, all other settings 0 and edge mode set at repeat.
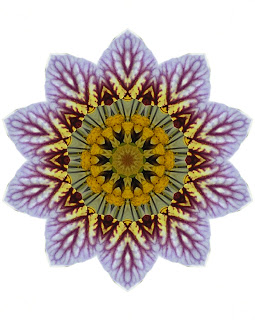
Image 1
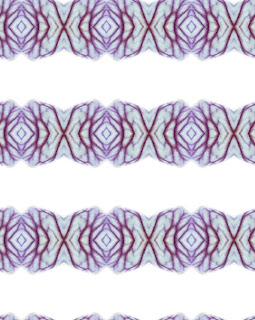
2.  Kaleidoscope effect with different settings - horizontal offset 100%, vertical offset -63%, angle 152, scale -4, 7 petals, radial suction 39.
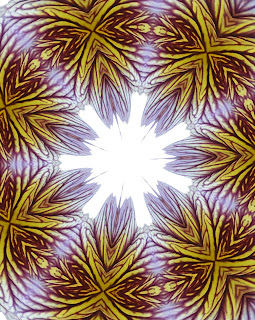
Image 2


3. Kaleidoscope effect again applied to the saturated image of flower head 3 (see last post)  with settings - 6 petals, angle 274, scale -31, edge mode set at wrap.

Image 3

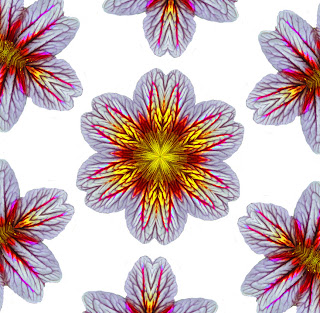
4. Pattern effect - horizontal offset 68%, vertical offset 62%, rotation 90, 3 columns and 3 rows.

Image 4
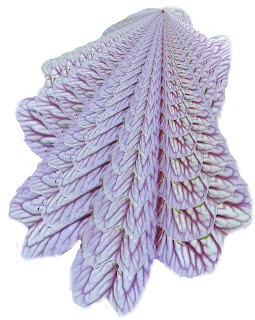
 5. Flower head 1 and feedback effect.  I used the randomiser which came up with these settings - opacity 85%, horizontal 28, intensity 95, vertical -93, elliptical.  I like the build up of overlapping petals in this one and the repeated shapes - could be the start of an idea for a 3d piece?  I see it as a long trailing cloak, perhaps a stage costume. It could either be very stiff and heavy with the layers standing apart (think Sydney Opera House) for a haughty queen  or soft and light for a gentle character. Not so keen on the colour (too bland) so I would reintroduce the gold/yellow shades.

Image 5


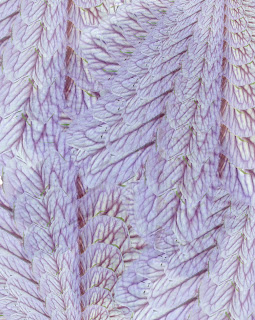
6. Image 5 repeated, flipped, layered.  Seems to have turned into bird's wings.

Image 6
 I mentioned before that I had done a little bit of drawing over the summer - image 7 shows the sketches.  On the right are a rose in fine black pen and red marker pen; bottom right corner a gladioli (gladiolus?) in soluble pencils; left side using soluble pencils to explore shapes and colours from my flower photos; top left drawing the shapes from image 5.

Image 7
 The next few photos are different drawings from the photos.   I have included a 2p coin (1") for scale as they are different sizes.

  
Image 8
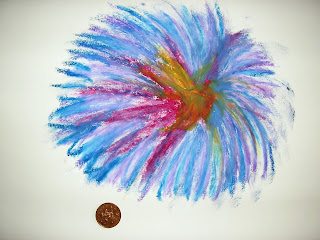
 Image 8 is soft pastels, image 9 is Markal sticks.  I like the energy in this one, although it looks more like a dahlia than the original flower.

Image 9
Image 10  - soft pastels on black paper.
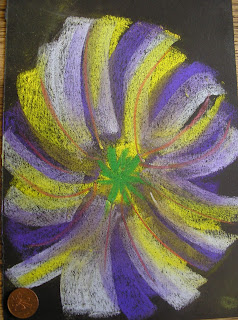
Image 10      
Next come the decorated papers, these are all A3 sheets. First is just stripes of colours.

Image 11
 Next I cut out card templates of the flower head and used it to rub off soft pastels (left) and Markal sticks (right). I washed the right hand one with ink but didn't like the colour, so I added pastels on top to tone it down.  You can see the templates on top of the papers.
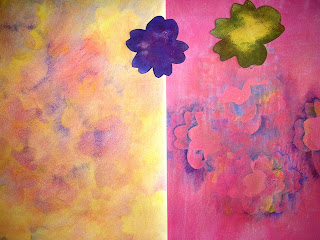
Image 12
 Next, I made a string block in the shape of the petals and used it for two more papers. Image 13 is a rubbing with Markal sticks.

Image 13
Image 14 is the block pressed into a layer of gesso and coloured with soft pastels and also shows the block.
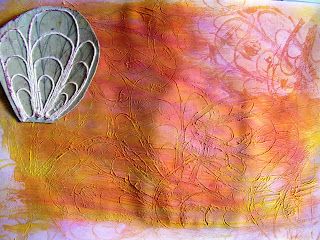
Image 14
And finally, I couldn't resist trying this - a pylon photo repainted with image 14, more fun than grey.
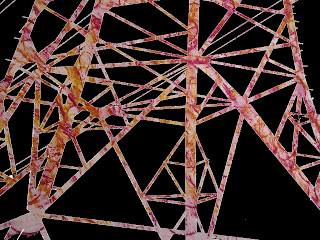
Image 15

Friday, November 19, 2010

Module 4 Chapter 3 - part 1


Following on from my last post - at Sian's suggestion, I have added a postscript to the virtual sketchbook for Glimpsing the Storm explaining how I used a telescopic pole to make it freestanding - you never know when it may be useful.

For chapter 3, I am exploring ideas that could be turned into 'slips' for embroidery, based on flowers.  I did sort of start doing this in the summer and sketched a couple of flowers but now we are in November, I have turned to my photo collections for inspiration.  I found I had rather a lot of close-ups of flowers, so I chose three to work with; two are from a visit to the National Botanical Gardens of Wales (I don't know what the flowers are - can anyone enlighten me?) and the third is a rose from our garden.

Source photo 1

Source Photo 2

Source photo 3
 Then I played in Paint Shop Pro - the first step was to isolate 3 of the flowers by using lassoo selection and pasting as a new image, which has a transparent background. 


Flower head 1

Flower head 2

Flower head 3


Then I created the following images

1. Flower head 1 changed to greyscale and applied black pencil effect.  Suggests a padded or quilted piece.
Image 1
2. Flower head 1 with rough leather texture effect

Image 2
3. Image 2 layered on top of a copy of flower head 1 with the opacity of the top layer reduced to 44%.  I used the eraser to rub away parts of the centre of the top layer to reveal the colours beneath and applied the rough leather texture again. 
Image 3

4.Flower head 3 with the details softened by the smudge brush.

Image 4
 5. Flower head 3 with the hue brush applied
Image 5


 6.Flower head 3 with saturation brush
Image 6
7. Three copies of flower head 1 layered up slightly misaligned and opacity reduced between layers to 50%. I tidied up the image by using the eraser and the clone brush to remove the extra stalks and  fill the gap with nearby colours, and then ran the soften brush around the edge. This image is less harsh than the original photo and suggests silk shading or layers of sheers.  Or the softness could be translated into felt.
Image7
8. I wanted to try using the shape of flower head one as a template so I used it as a mask layer on source photo 3.  I had an idea of it being crammed full of petals or flowers - this trial doesn't look right so I may come back to it, I may be able to play with the scale.
Image 8
9. I printed out copies of all these images to make up sketchbook pages and when I was cutting them out, I put one on a background and took a  photo.  The background is a used piece of TAP (I had been experimenting with transferring an image onto a collage of fabric scraps but the printer ran out of coloured ink and produced a peculiar colour.  I went ahead anyway to see how the fabrics took the transfer and it left behind a lovely grungy texured image on the paper).

Image 9
10. I scanned in the sheet of TAP, put image 7 on top and cropped to a square.

Image 10
11. I pulled out an image from my module 1 study of pylons which was a scan of a paper rubbing and used it as a background.  On top, I used flower head 3 which I had manipulated as for image 7.

Image 11

Wednesday, November 10, 2010

Website Update

One last photo for the assessment piece - I have put all the stitch samples together onto one long strip for storage.  As before, I have gathered up all the notes and photos from this log into a 'sketchbook' on my website, which you can find at http://www.janeoleary.name/ - follow the link for Glimpsing the Storm.

Tuesday, November 09, 2010

Module 4 Chapter 2

 For this chapter, I have been working tiny samples based on stitches and styles from Elizabethan and Russian embroidery studied for chapter one.  I have worked in the style of a spot sampler on red silk.


The black and white image below gives the key for the samples. I have just realised that I forgot to include a size reference in the photo, but sample 5, the tudor rose, is 4.5cm across.


1. Motif from an 18th century Russian towel edge - chain stitch in metallic thread with small sequins.
2 Flower from Russian peasant embroidery - chain stitch and satin stitch.
3. Stem in raised stem band.
4. As 1 but reworked a little larger in black stranded cotton.
5 Tudor rose design taken from an Elizabethan hanging - worked in cross stitch and French knots on waste canvas, outlined with back stitch.
6. Silk shading on linen backed with calico, cut out and sewn onto background with edges turned under.
7. Ceylon stitch over a wired shape - stitched on calico, cut off and attached to background by one edge.
8. Satin stitch over petal cut from craft vilene.
9. Detached buttonhole worked on calico and cut off, then applied to the background over a black felt petal.
10. Blackwork pattern taken from a 17th century sampler and stitched on linen, petal edged in stem stitch.  applied to background with edges turned under.
11. Flower centre filled with speckling.
12.Leaf copied from Elizabethan hanging - layers of satin stitch in cotton perle over two layers of felt padding.  Edge, stalk and central vein in couched gold jap, other details in stranded cotton.

I am also including here a picture of a cushion I finished earlier this year following a workshop with Fay Maxwell as it shows another interpretation of flowersand more stitches, this time based on crewel work.  The flowers are cut freehand from thick felt and the stitches worked in tapestry wools and perle threads.  The background is silk supported by cotton and it has been backed with wadding and another layer of cotton, and quilted in the style of a kantha which makes the petals stand out. I added further padding to a few of the petals by cutting into the backing to raise them up further before the quilting was done.

Tuesday, October 05, 2010

Ceili Headbands Done and A Tiny Animation

It took a while but they are finally done - 17 headbands for the dance school -  and the girls wore them for the All Englands competition last weekend.  Here are a few  - the photo doesn't do justice to the effect of the crystals which really sparkled on stage.

For the September ATC swap, we had to include something beginning with our initial.  I used some of the scraps from the monoprinting I did last month to make J is for Jugs.


Finally, thanks to Sharon over on Pintangle for highlighting this animation by Aardman featuring Dot, the world's smallest stop motion animation character, as she tries to escape from an unravelling textile.  The 'making of' film is also fascinating.

Friday, September 24, 2010

Inspiring Photography

Soon, I will get some coursework done, I promise.  Meanwhile, I was at a wedding last weekend, and was introduced to a fellow guest who turned out to be a French photographer who takes the most wonderful pictures of rusty surfaces and broken bits of machinery.  How lucky is that?  So we had a bit of a chat (sort of - I can't speak French) about colour and texture and swopped blog addresses.  Go and take a look for some inspiration at http://kadier.canalblog.com/.

Monday, August 30, 2010

Finishing off Week

Its a good week for finishing off.  Do you remember this cushion from earlier posts?  Just about done before it reached its first anniversary.

Sunday, August 29, 2010

Animated Weaving

The potatoes are boiling over, the roast is overdone but before I go offline I had to share this with you.  Follow the link to see a marvellous animated weaving.

http://amovablefeast.blogspot.com/2010/08/mother-of-all-projects.html

Thursday, August 26, 2010

Summer Playing

Well, August seems to have shot by in a blur of busy-ness. I can't believe it is almost two weeks since the Three Choirs Festival in Gloucester - I was showing work in an exhibition (which you can read about over on Gallimaufry) and singing in the choir for Jazz Psalm Sunday in the cathedral. Quick plug here- the BBC recorded the concert and it is apparently going to be broadcast on Radio Gloucestershire on Bank Holiday Monday and after that will be available on BBC i-player Update - 2pm on Monday 30th 107.40FM or online at BBC.co.uk. It is a wonderful mix of gospel and jazz with a large choir and fantastic musicians - highly recommended. End of plug.

So, you know how it is after you have worked really hard for an event and when it is over you feel a bit flat. I thought I would liven myself up by showing you some things I have been playing with in between acting as chauffeur for the kids.

First up, lots of printing on fabric to practice the layering techniques learnt with Ruth Issett at the Distant Stitch summer school. No particular plans for these at the moment, just lots of samples.

Using stitch as a resist. The one on the left was an impression of the one on the right (put the fabric on top and rolled over).

Layers of textile paint and a thermofax screen.


This sample was folded, stitched and painted several times - you can see the stages although they seem not to be in the right order.


Added monoprints.

Tried a fish stencil - not sure I like it!


A little piece made into a card.

I keep thinking I need to improve my control on my free machining, so I have tried working some patterns from Leah Day's blog http://freemotionquilting.blogspot.com/ - she posts videos to show how they are done. I have been practicing on 4" squares round the edge of a quilt sandwich that was a sample for my fish quilt. Not brilliant but getting better.