Wednesday, July 27, 2011

Sketchbook Day 9 Still no zebra.

Today is all about stripes. I folded a piece of of blue and white fabric and tried to draw just the pattern, seeing how the stripes behaved over the folds.  The first two sketches with soluble pencils were bit smudgy so I tried again with the wide end of a promarker and drew more boldly.  To find out about the exercises I'm doing go to Sian's blog.


Tuesday, July 26, 2011

Exhibition - Gordano Textile Artists

A quick plug for our exhibition coming soon - it is my first time with this well-established group so please come along if you are in the area.

 Gordano Textile Artists at the Toll House Gallery, Clevedon Pier, North Somerset.
2nd to 30th August, 10am to 5pm Mon-Fri, 10am to 6pm Sat and Sun.
Meet the artists each weekend 11am to 3pm - I will be there on Sat 6th August and Sat 27th August.

Sketchbook Day 8

Drawing without drawing - suggesting the object by drawing just the surface pattern. Kind of like the stripes without the zebra.  I didn't have a zebra handy so I used a shell instead.  My first attempt with a serrated edge and paint didn't work so I tried again with the side of a piece of charcoal.


Monday, July 25, 2011

Sketchbook day 7

Back to the cut  up apple,which is developing some lovely crinkly edges.  Today the challenge is to work larger and quickly using thick and thin lines - I used a piece of charcoal on its side for the edges and shadow.


Sunday, July 24, 2011

Sketchbook day 6

I'm feeling much better now so thanks to everyone for your good wishes.  As this exercise is all about shadows I have gone back to a banana.  This one has definite ridges and very little variation in colour so it made it easier to concentrate.

I got a bit lost with the first drawing and couldn't see what was banana and what was shadow, so for the second one I outlined in black pen.


Friday, July 22, 2011

Sketchbook Day 5

An apple a day...seems appropriate while I work my way through a large box of tissues.  The background is letter headings from old doctor's letters, crumpled and tea stained, which fits in with the cut apple turning brown and shrivelled.   I used  a medium black pen for the crinkly top edge and a finer one for the body to try and show the difference. 

Thursday, July 21, 2011

Sketchbook Day 3

I'm feeling sorry for myself with a horrible snuffly cold, which is my excuse for slipping behind.  This is from yesterday - I tried drawing a cut apple on the pages prepared  with tissue paper, which turned out to be more difficult than I thought going over the bumpy bits.

Monday, July 18, 2011

Sketchbook Project Days 1 and 2

I'm following along the sketchbook project Sian has set on her blog Stitch Loop (but a couple of days behind) so here is the first pair of pages with some fruit and slices of potato.  I have a couple of pages prepared now with scrumpled tissue paper and tea ready for the next drawing.


Trying again with Chapter 9 videos

Still can't do anything with the last post to sort out the videos so here they are again via YouTube.


Saturday, July 16, 2011

Module 4 chapter 9 Section C


Umm - these videos were supposed to be much further down the post but somehow they have ended up here as well.  I have no idea why and now I can neither delete nor move them, which rather spoils my layout, but I can't face doing the whole post again.  I just hope they work  - please let me know if they don't.

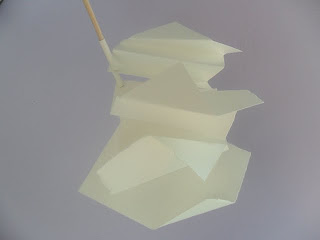
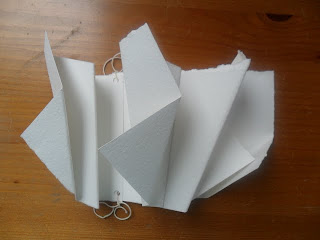
Exercise 1 - using a simple shape to make a series of 3d shapes.  I started with a set of squares torn from watercolour paper and folded them in sequence.  Photo 1 shows the way they were folded, photo 2 is one way of arranging them and photo 3 is the final choice with the pieces tied together - I omitted the last one as it didn't seem to fit in.
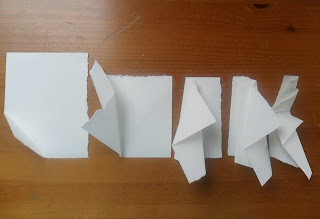
Photo 1

Photo 2

Photo 3
Exercise 2 Graded positive and negative shapes. Photo 4 shows the cut shapes, which I repeated many times.
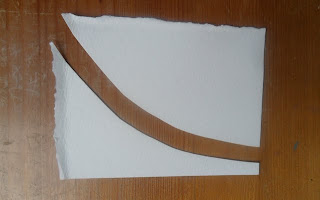
Photo 4
Photo 5 - the chunky shape curved by gentle rubbing and speared on a dowel in a spiral.
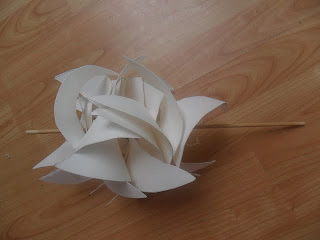
Photo 5
Photo 6 - another view with stronger shadows.
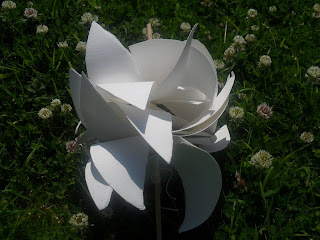
Photo 6

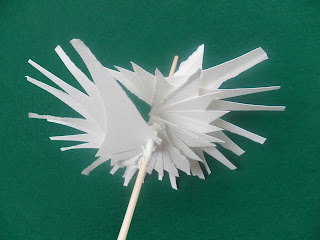
Photo 7 - the skinny shape spiralling on a dowel - I took it outside to get stronger shadows which adds an extra layer.  Photo 8 is included so you can see from a different angle how is spirals round along 3 or 4 inches of the doweland how the short and long ends create patterns.
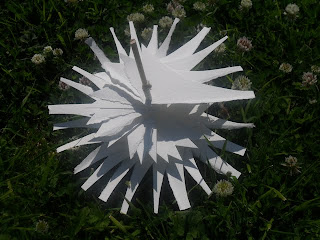
photo 7
Photo 8

 When I was trying to photograph this one from above, it wouldn't keep still until I stuck it in the ground.  However, as you know I love to have things moving and watching kinetic sculptures*, so I took a short video to see the effect - this could be fun with colour effects or with some kind of background that is glimpsed as it turns (back on animations and cogs again).


Exercise 3 Using colour and 3d shapes.  For this exercise, I returned to the petal shape and used two photocopies of painted papers stuck together. Photo 9 shows the shape simply slotted together.
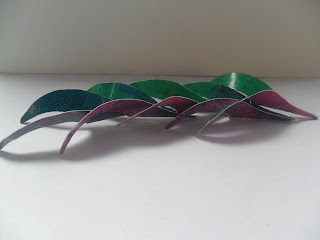
Photo 9
 Photo 10 a more interesting arrangement - it puts me in mind of dancers practising at the barre.
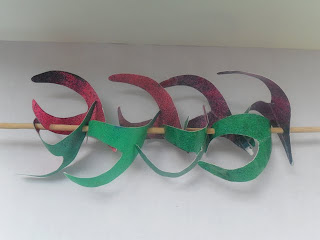
Photo 10

Again, a short video to show how it looks from different angles and the effect of the colours moving around.

*you can see some here and here.

Module 4 chapter 9 section B Ex 2

Using the same shape and colours as before in this chapter but with water soluble crayons to explore the negative space. Just changing the medium gives a very different effect even though the designs are similar to the earlier exercises.

Photo 1 from left to right - running the crayons off the edge of parts of the stencil then moving and repeating, leaving a series of incomplete shapes; colouring around the stencils then washing with water to blend the colours and let them spread into the spaces; as before but washing with the stencil in place so the edges are softened but the white space retained.  
Photo 1


Photo 2
 Photo 2 - left and also photo 3 -replacing cut shapes slightly offset.  Photo 2 right, I placed the coloured cut shapes on the background and used a wet brush to sweep colour over the edge, then moved the shape and repeated. 
Photo 3
Of these, my favourites are the two that just use outlines (left in photo 1 and right in photo 2).  I like the delicacy of them both, contrasting with the strong shapes and colours in exercise 1, and the first in particular would translate easily to stitch.

Summer School 2011

I' m having one of my periodic catch up days so this will be the first of several posts - hopefully in the right order!

Going back to Urchfont Manor, it is as if we have never been away, it is such a wonderful few days.  This year we split into two groups, some working with Jan Evans and I was with Mary Sleigh, learning about textiles from Africa.  Mary shared her knowledge of the materials, the stitches and the people who make them and then we each spent time closely studying an item chosen from her collection.  This led on to stitching samples using aspects of the style but making it relevant to us as individuals.

A strong feature of the cloth I looked at were the hems turned to the right side and the piece was made from joined squares of raffia so I reflected this in the samples and used the stitches Mary had shown us for joining and hemming. I also incorporated the idea of using what is to hand - in this case the random items that live in my sewing box - so you can see a hook and eye as decoration and cut up fragments of bobbin lace (samples I made years ago) and paper.

Sections for the final strip before assembling

The final strip on the left and small samples on the right.